注:本博客仅供技术研究。如果其信息用于其他目的,用户将承担全部法律和连带责任。本博客不承担任何法律和连带责任。请遵守中华人民共和国安全法
黑客19引领实战潮流,回归技术本质,以行动推动行业技术进步
唯一的联系方式[email protected] 和 [email protected]
欢迎转载,但请注明原始链接,谢谢!
验证码预处理
下载验证码
实现代码:
def get_checkcode(i):
r = requests.get(‘http:///CheckCode.aspx?’)
picname = str(i) ‘.png’
with open(‘image\\’ picname,‘wb’) as f:
f.write(r.content)
print(“downloading code %d.png” % i,)
if __name__ == ‘__main__’:
for i in range(1,1000):
get_checkcode(i)
代码分析
- 利用requests库里的get方法访问生成验证码页面,并将验证码图片保存到本地。
代码测试:

灰度化,分割
实现代码
from PIL import Image,ImageTk,ImageFilter
def get_checkcode(i):
r = requests.get(‘http:///CheckCode.aspx?’)
picname = str(i) ‘.png’
with open(‘image\\’ picname,‘wb’) as f:
f.write(r.content)
print(“downloading code %d.png” % i,)
def process_pic(i):
picname = str(i) ‘.png’
im = Image.open(‘image\\’ picname)
im = im.point(lambda i: i > 43,mode=’1′)
im.save(picname)
y_min,y_max = 0,22 # im.height – 1 # 26
split_lines =
ims = [im.crop([u,y_min,v,y_max])
for u,v in zip(split_lines[:-1],split_lines[1:])]
return ims
if __name__ == ‘__main__’:
for i in range(1,5):
get_checkcode(i)
ims = process_pic(i)
print(“saving code %d.png cutted” % i)
for j in range(0,4):
ims[j].save(str(i) ‘_’ str(j) ‘.png’)
代码分析
- point()通过函数或查询表处理图像中的像素点,im = im.point(lambda i: i > 43,mode='1')
中lambda i全图,43为阀值,大于43填1,小于43填0,mode=意思是输出模式为整数型,从而实现灰度化。 - y_min,y_max = 0,22设置验证码图片中最大的y值和最小的y值。
- zip(split_lines[:-1],split_lines[1:])运行结果为[5,17,29),(29,41)
- im.crop([u,y_min,v,y_max]),crop()函数用于复制图片中的矩形内容,并将参数传输到矩形的四个边缘。
- 所以通过以上crop()函数实现图片的分割。
代码测试

标识
代码分析
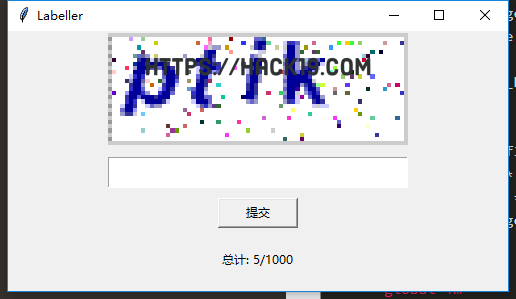
- 利用Python图形开发界面的库tkinter人工识别验证码,在图形界面上显示验证码图片。
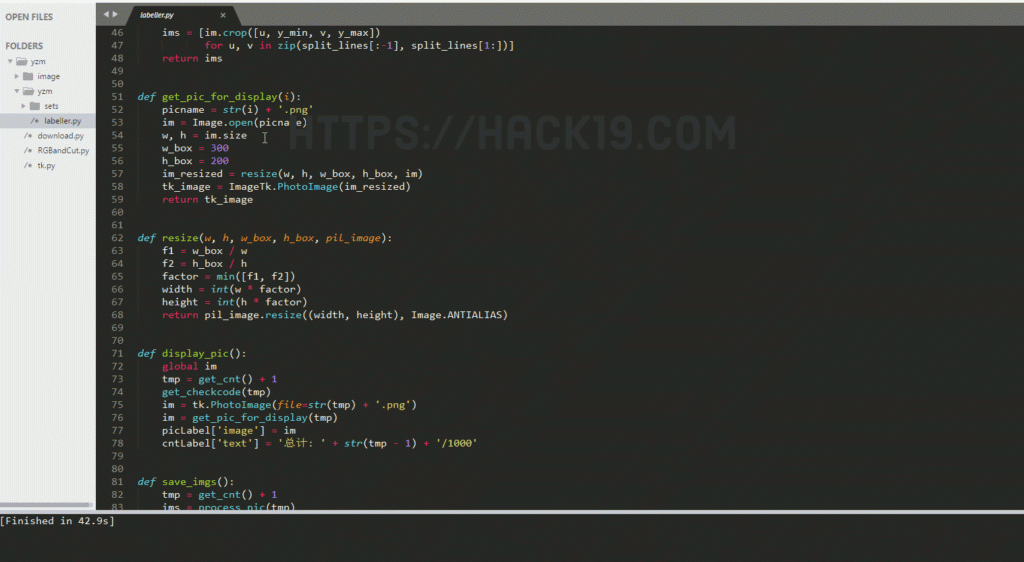
- resize()函数放大爬虫爬行验证码,有利于识别。
- display_pic()函数中tk.PhotoImage()方法插入图片。
实现代码
picname = str(i) ‘.png’
im = Image.open(picname)
w,h = im.size
w_box = 300
h_box = 200
im_resized = resize(w,h,w_box,h_box,im)
tk_image = ImageTk.PhotoImage(im_resized)
return tk_image
def resize(w,h,w_box,h_box,pil_image):
f1 = w_box / w
f2 = h_box / h
factor = min([f1,f2])
width = int(w * factor)
height = int(h * factor)
return pil_image.resize((width,height),Image.ANTIALIAS)
def display_pic():
global im
tmp = get_cnt() 1
get_checkcode(tmp)
im = tk.PhotoImage(file= str(tmp) ’.png’)
im = get_pic_for_display(tmp)
picLabel[‘image’] = im
cntLabel[‘text’] = ‘总计: ‘ str(tmp-1) ‘/1000’
代码测试

归类
代码分析
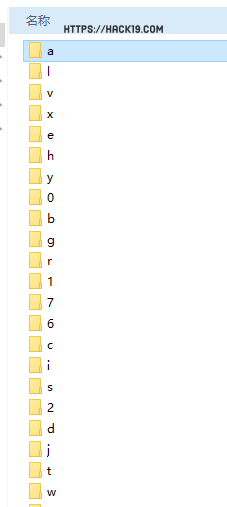
- code = var.get()获取图形界面输入的验证码的值,其类型为一个数组,其中有四个字符。
- for i in range(4):遍历四个字符,判断输入的字符值将他们保存到set\相应的字符在目录中。path = os.path.join(BASE_DIR,'sets',code[i])是将BASE_DIR,'sets',code[i]三个参数组合成一个路径返回path,后续用了一个if else判断目录是否存在,不存在即用makedirs创建目录。并创建和更新目录conut.txt该值用于记录当前路径下字符验证码图片的数量。ims[i].save(charname)将验证码分隔后获得的图片保存到当前目录中。
实现代码
tmp = get_cnt() 1
ims = process_pic(tmp)
code = var.get()
for i in range(4):
BASE_DIR = os.path.dirname(os.path.realpath(__file__))
path = os.path.join(BASE_DIR,‘sets’,code[i])
if os.path.exists(path):
filepath = os.path.join(path,‘count.txt’)
with open(filepath,‘r’) as f:
char_cnt = eval(f.readline())
else:
os.makedirs(path)
filepath = os.path.join(path,‘count.txt’)
with open(filepath,‘w’) as f:
f.write(‘0’)
char_cnt = 0
charname = os.path.join(path,str(char_cnt 1) ‘.png’)
ims[i].save(charname)
filepath = os.path.join(path,‘count.txt’)
with open(filepath,’w ’) as f:
f.write(str(char_cnt 1))
update_cnt(tmp)
代码测试

完整代码的预处理
import requests
from PIL import Image,ImageTk, ImageFilter
import numpy as np
import pandas as pd
from matplotlib import pyplot as plt
import os
def get_cnt():
try:
with open(‘count.txt’,‘r’) as f:
cnt = f.readline()
cnt = eval(cnt)
return cnt
except:
with open(‘count.txt’,‘w’) as f:
f.write(‘0’)
return 0
def update_cnt(cnt):
with open(‘count.txt’,‘w ’) as f:
f.write(str(cnt))
def get_checkcode(i):
r = requests.get(‘http:///CheckCode.aspx?’)
picname = str(i) ‘.png’
with open(picname,‘wb’) as f:
f.write(r.content)
def process_pic(i):
picname = str(i) ‘.png’
im = Image.open(picname)
im = im.point(lambda i: i != 43,mode=’1′)
y_min,y_max = 0,22 # im.height – 1 # 26
split_lines =
ims = [im.crop([u,y_min,v,y_max])
for u,v in zip(split_lines[:-1],split_lines[1:])]
return ims
def get_pic_for_display(i):
picname = str(i) ‘.png’
im = Image.open(picname)
w,h = im.size
w_box = 300
h_box = 200
im_resized = resize(w,h,w_box,h_box,im)
tk_image = ImageTk.PhotoImage(im_resized)
return tk_image
def resize(w,h,w_box,h_box,pil_image):
f1 = w_box / w
f2 = h_box / h
factor = min([f1,f2])
width = int(w * factor)
height = int(h * factor)
return pil_image.resize((width,height),Image.ANTIALIAS)
def display_pic():
global im
tmp = get_cnt() 1
get_checkcode(tmp)
im = tk.PhotoImage(file=str(tmp) ‘.png’)
im = get_pic_for_display(tmp)
picLabel[‘image’] = im
cntLabel[‘text’] = ‘总计: ‘ str(tmp – 1) ‘/1000’
def save_imgs():
tmp = get_cnt() 1
ims = process_pic(tmp)
code = var.get()
for i in range(4):
BASE_DIR = os.path.dirname(os.path.realpath(__file__))
path = os.path.join(BASE_DIR,‘sets’,code[i])
if os.path.exists(path):
filepath = os.path.join(path,‘count.txt’)
with open(filepath,‘r’) as f:
char_cnt = eval(f.readline())
else:
os.makedirs(path)
filepath = os.path.join(path,‘count.txt’)
with open(filepath,‘w’) as f:
f.write(‘0’)
char_cnt = 0
charname = os.path.join(path,str(char_cnt 1) ‘.png’)
ims[i].save(charname)
filepath = os.path.join(path,‘count.txt’)
with open(filepath,‘w ’) as f:
f.write(str(char_cnt 1))
update_cnt(tmp)
def submit():
save_imgs()
display_pic()
var.set(”)
def init():
display_pic()
global im
app = tk.Tk()
app.title(‘Labeller’)
app.geometry(‘500×260’)
picLabel = tk.Label(app)
picLabel.pack()
var = tk.StringVar()
textInput = tk.Entry(app,textvariable=var)
textInput.pack(expand=’yes’,fill=’both’,padx=100,side=’top’,pady=10)
submitButton = tk.Button(app,text=”提交”,width=’10’,command=submit)
submitButton.pack()
cntLabel = tk.Label(app)
cntLabel.pack(pady=20)
init()
app.mainloop()

验证码训练
图片数据的加载和处理
for i in range(0,len(data)):
if(data[0][i] > 0):
data[0][i] = 1
return data
def load_image(path):
im = Image.open(path)
data = np.array(im.getdata()).reshape(1,-1)
data = process(data)
return data
- process()函数是实现二值化的过程。
- data = np.array(im.getdata()).reshape(1,-1)中的im.getdata()包含像素值sequence以包含像素值的形式返回图像的内容sequence对象形式返回图像内容,对象的每个元素对应一个像素点R、G和B三个值。
filepath = os.path.join(path,char,‘count.txt’)
with open(filepath,‘r’) as f:
cnt = eval(f.readline())
return cnt
def get_label(char):
global char_list
for i in range(0,len(char_list)):
if char_list[i] == char:
return i
def build_char_set(path,char):
cnt = get_count(path,char)
x = np.zeros((cnt,264))
y = np.zeros((cnt,1))
for i in range(1,cnt 1):
filepath = os.path.join(path,char,str(i) ‘.png’)
x[i – 1,:] = load_image(filepath)
y[i – 1] = get_label(char)
char_set = np.hstack((x,y))
return char_set
def build_sets(path):
global char_list
sets = build_char_set(path,char_list[0])
for i in range(1,len(char_list)):
char_set = build_char_set(path,char_list[i])
sets = np.vstack((sets,char_set))
return sets
- cnt = get_count(path,char)通过get_count()函数读取相关字符目录count.txt文件值。
- x = np.zeros((cnt,264)) y = np.zeros((cnt,1))用0填充数组返回给定形状和类型的数组np.zeros生成(cnt,264)和(cnt,1)的数组下x,y。
- get_label()函数用来读取人工标识获取的char值。load_image()函数用于读取文件目录下的字符。for循环分别填充刚生成的循环y,x数组。
- np.hstack((x,y))将填充的y,x数组将水平(按列顺序)堆叠数组。char_set。
- for i in range(1,len(char_list)):通过遍历所有字符,得到所有字符的水平(按列顺序)堆叠数组的结果,然后使用sets = np.vstack((sets,char_set))垂直(按行顺序)堆叠数组复制set。
配置SVM模型
length = int(len(sets) * percent)
return sets[0:length,:]
def build_test_sets(sets,percent):
length = int(len(sets) * (1 – percent))
return sets[length:len(sets),:]
- 声明两个函数分别是build_training_sets(sets,percent)和build_test_sets(sets,percent)。这两个函数参数是sets和percent即上部分析sets用于建立训练集和测试集。
加载测试集和训练集
x = training_sets[:,0:264]
y = training_sets[:,264].reshape(-1,1)
clf = svm.LinearSVC()
clf.fit(x,y)
return clf
def recognize(y):
global char_list
return char_list[y]
def predict(clf,x):
return recognize(int(clf.predict(x)[0]))
def accuracy(pred,real):
cnt = 0
for i in range(len(pred)):
if pred[i] == real[i]:
cnt = cnt 1
return cnt / len(pred)
def test(clf,test_sets):
x = test_sets[:,0:264]
y = test_sets[:,264].reshape(-1,1)
length = x.shape[1]
pred = []
real = []
for i in range(0,length):
pred.append(predict(clf,x[i,:].reshape(1,-1)))
real.append(recognize(int(y[i])))
return accuracy(pred,real)
- train(training_sets)函数中x和y训练集数据是用来生成的,可以在后续函数中知道。
- clf = svm.LinearSVC()初始化一个SVM模型。clf.fit(x,y)用x和y作为训练数据拟合模型。
- predict(clf,x)是预测load_image()函数用于读取文件目录中字符的类函数
- test(clf,test_sets)函数是用来处理测试集数据的函数,在函数中加载测试集sets数据,并计算测试集精度由accuracy()函数返回。
训练、测试和更新
BASE_DIR = os.path.dirname(os.path.realpath(__file__))
data_path = os.path.join(BASE_DIR,‘sets’)
model_path = os.path.join(BASE_DIR,‘model’,‘svm.model’)
sets = build_sets(data_path)
for i in range(5):
np.random.shuffle(sets)
training_sets = build_training_sets(sets,0.9)
test_sets = build_test_sets(sets,0.1)
model = train(training_sets)
res = test(model,test_sets)
joblib.dump(model,model_path)
print(‘Model updated! The accuracy on test sets: ‘ str(res))
- 从update_model()函数分析显示加载相应的图像数据和svm模型。
- for i in range(5): np.random.shuffle(sets)利用一个for循环生成5个用途np.random.shuffle(sets)函数打乱顺序sets值。
- 利用training_sets = build_training_sets(sets,0.9)和test_sets = build_test_sets(sets,0.1),上述两个函数创建训练集和测试集。
- model = train(training_sets)加载训练集,训练模型。res = test(model,test_sets)返回测试集的精度。
- joblib.dump(model,model_path)使用joblib从保存模型到响应目录生成新的保存模型SVM模型。
识别验证码
加载和处理验证码
im = Image.open(path)
im = im.point(lambda i: i != 43,mode=’1′)
y_min,y_max = 0,22 # im.height – 1 # 26
split_lines =
ims = [im.crop([u,y_min,v,y_max])
for u,v in zip(split_lines[:-1],split_lines[1:])]
return ims
def process(data):
for i in range(0,len(data)):
if(data[0][i] > 0):
data[0][i] = 1
return data
- process_pic()函数和process()函数在前面labeler模块已经出现,第一个函数用来分隔验证码,将验证码分成四部分。第二个函数用于二值化。
识别验证码
model_path = r’./model/svm.model’
model = joblib.load(model_path)
char_list = list(“0123456789abcdefghijklmnopqrstuvwxy”)
ims = process_pic(path)
code = []
for j in range(4):
data = np.array(ims[j].getdata()).reshape(1,-1)
data = process(data)
code.append(predict(model,data))
return code[0] code[1] code[2] code[3]
- recognize_checkcode(path)首先通过函数joblib的load加载保存模型的方法。
- process_pic(path)分隔图片,for j in range(4)循环二值化分隔的四个图像。
- predict(model,data),添加四个图像SVM模型测试。数组使用结果append将方法添加到数组中。
这个渗透教程到此结束!希望大家看看借鉴。如果您有技术咨询,请联系我们
黑客19引领实战潮流,回归技术本质,以行动推动行业技术进步
唯一的联系方式[email protected] 和 [email protected]
欢迎转载,但请注明原始链接,谢谢!